Exposure Explained! Photography Tips for DSLR Beginners
If you're a beginner photographer, trying to figure out what your camera settings actually do... this video is perfect for you! I explain exposure and how ISO, aperture (f/stop), and shutter speed affect your photos.
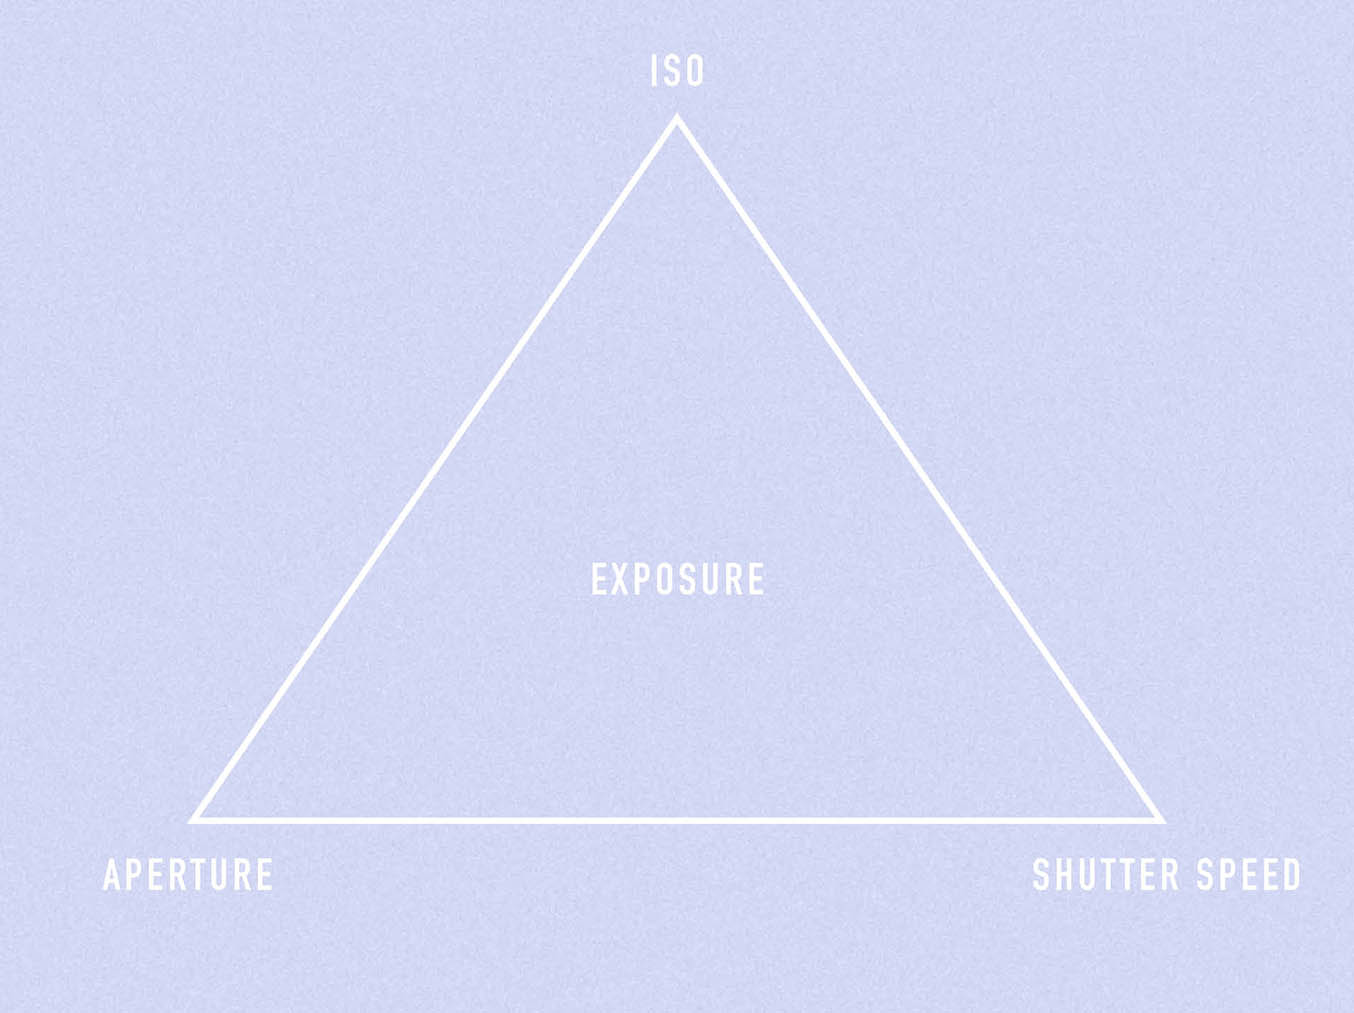
WHAT IS EXPOSURE?
Basically, exposure is the "brightness" of a photo. It's the amount of light that's hitting the film (or sensor, if you're using a digital camera). But really, it's so much more than that. Knowing how to control exposure will teach you so much about your camera and how to have control over your photos.
The three main factors for exposure are ISO, Aperture, and Shutter Speed. This is usually called "the Exposure Triangle". We'll break each of these down in more detail, because knowing what they do in relation to exposure and the other affects they have on the image is really important in photography.
These three camera settings work together to create the exposure. Here's an example:
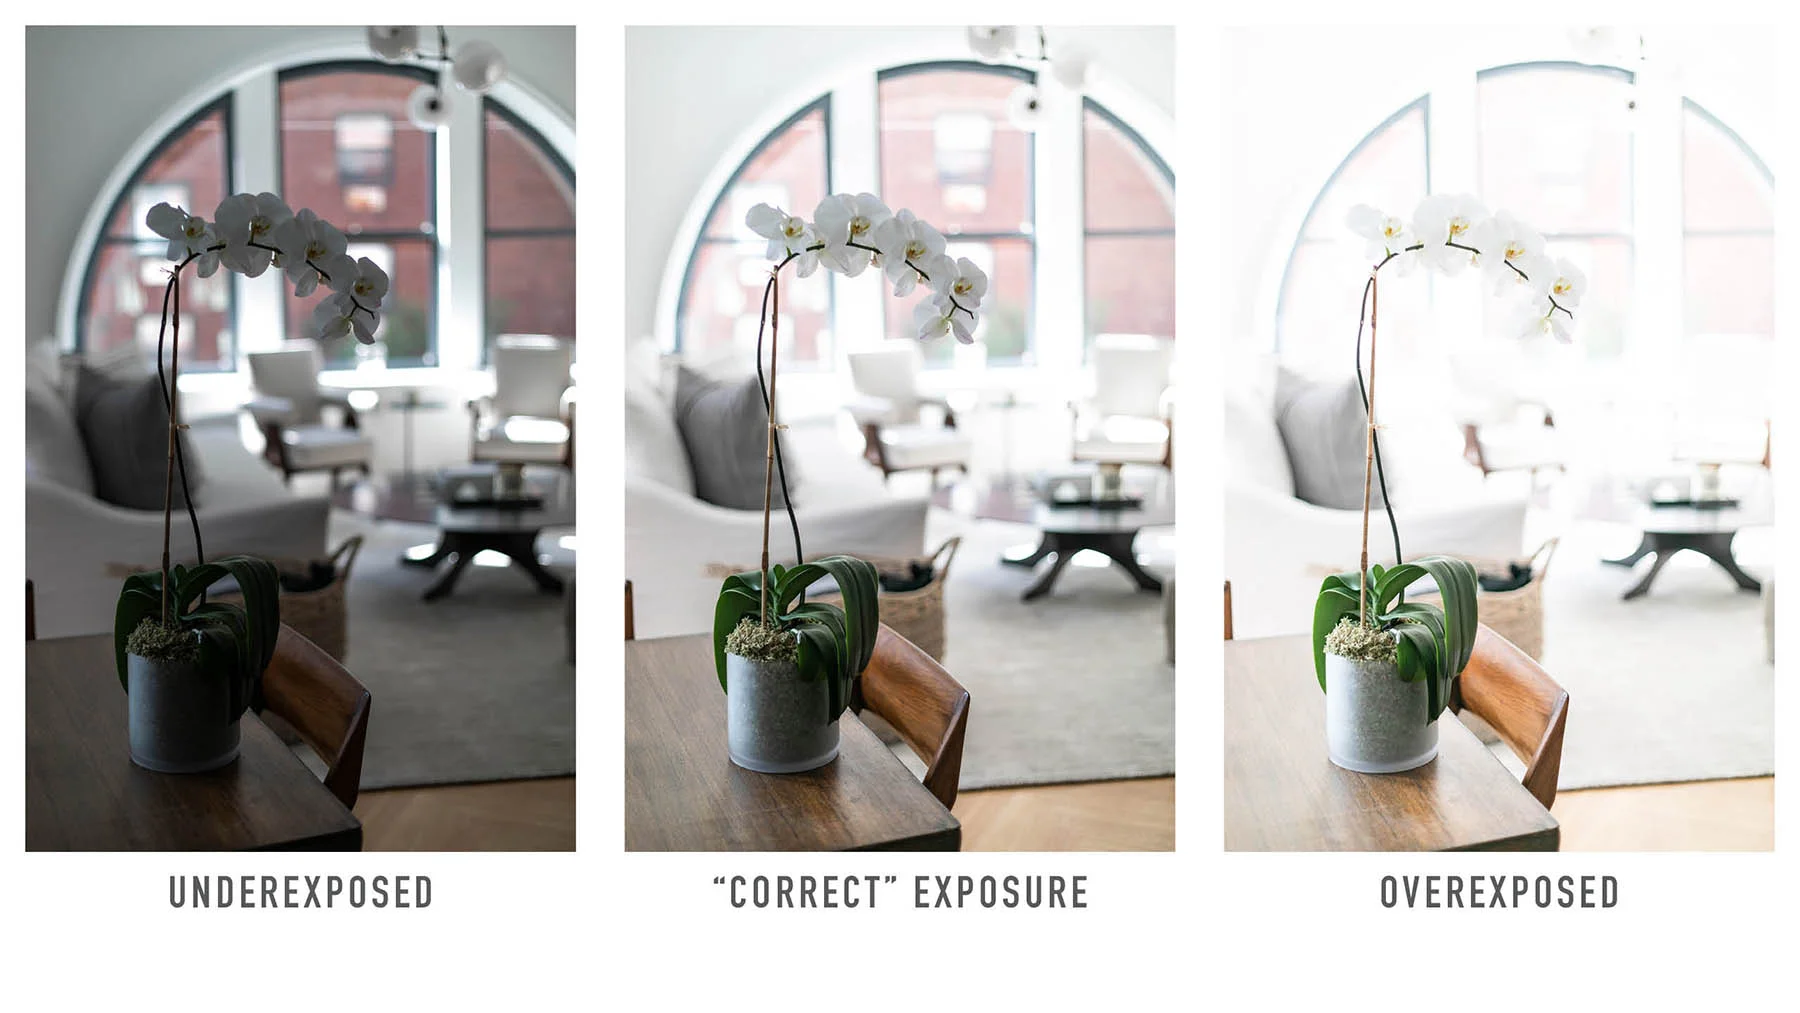
Correct Exposure is when an image is properly balanced. Underexposed is too dark, there isn't enough light hitting the film. Overexposed is too bright, there is too much light hitting the film.
Now let's get into those three parts of the Exposure Triangle and see how we can use them to get the type of images we're looking for!
ISO
ISO stands for "International Standards Organization", if you're using film, the film has a number on it. Usually something like 200 or 400. This number corresponds to how sensitive that film is to light!
A lower ISO (like 100 or 200) means the film is less sensitive to light and would be good for bright situations like outdoors in direct sunlight.
A higher ISO (like 800 or even up to 3,200 or higher) means the film is more sensitive to light and good for darker settings like nighttime or indoors.
Now, if you're thinking... how does this apply to me, I don't use film? Most digital cameras have an ISO setting or will automatically choose an ISO based on where you're shooting.
The ISO number doesn't have a major difference on the shot, but higher ISO settings will have more noise/grain! Take a look below 👇
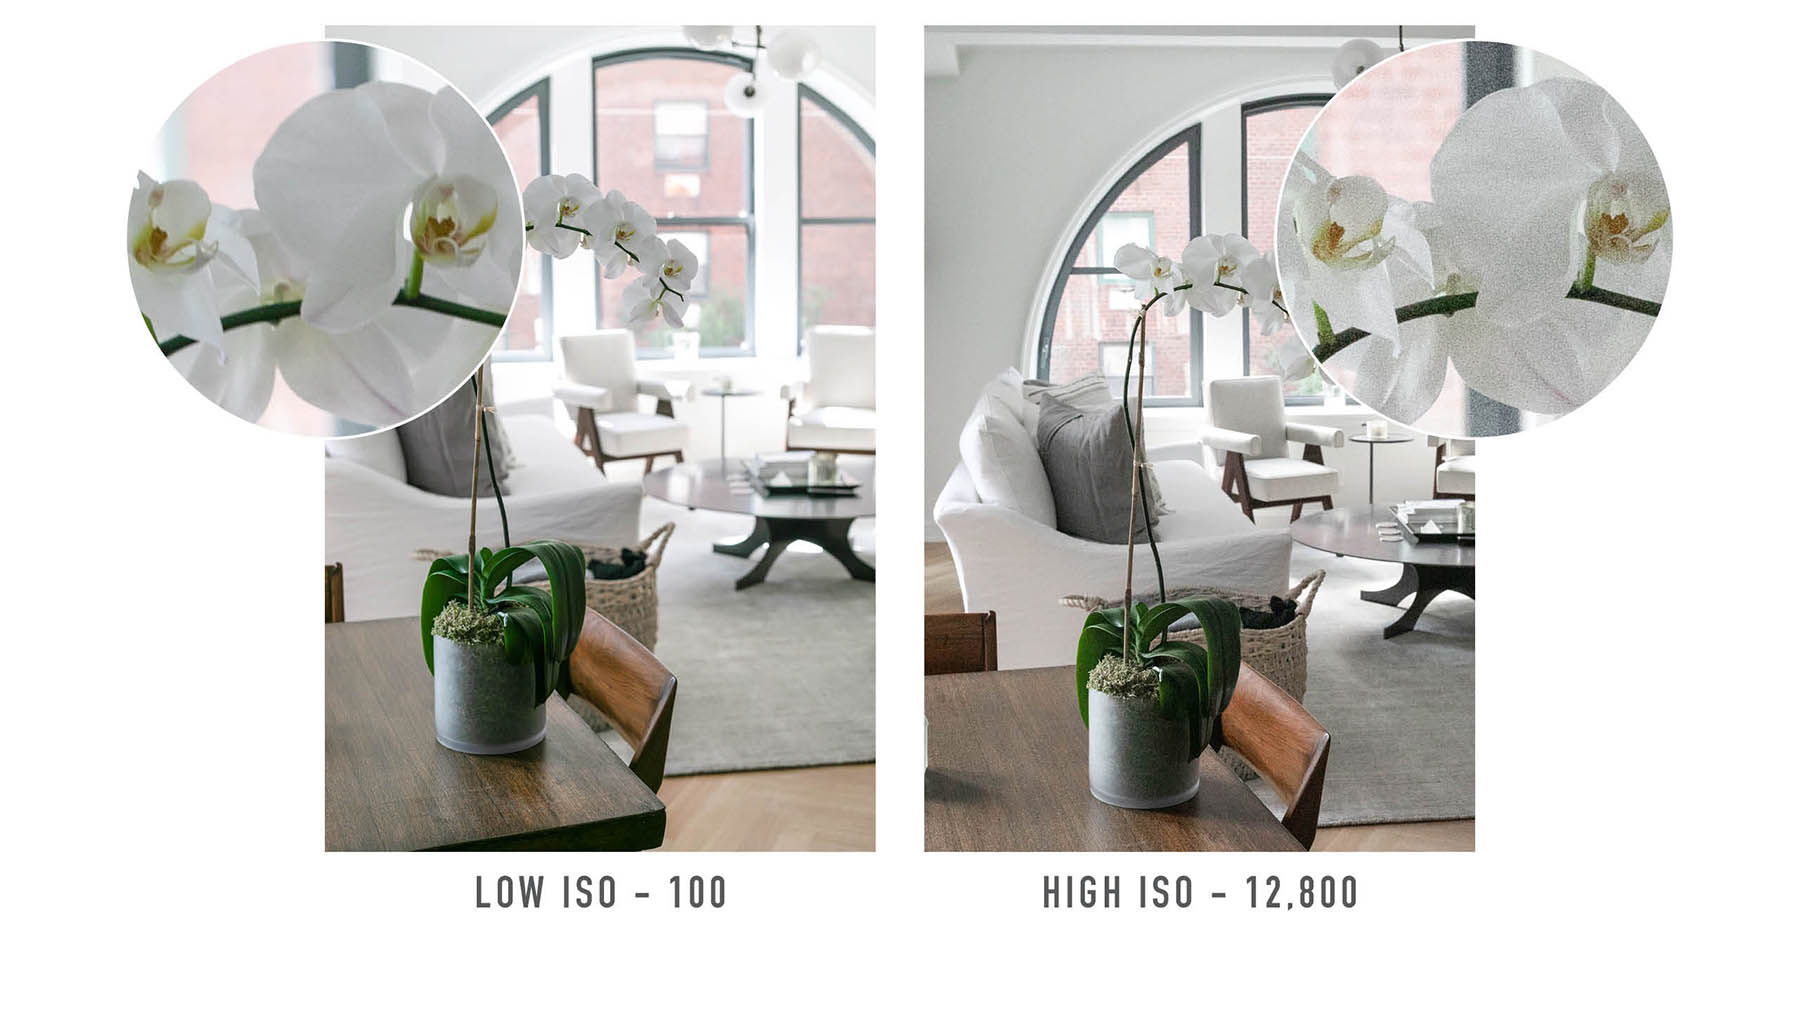
Especially noticeable in the details, the 12,800 ISO (which is very high!) looks a lot noisier than the 100 ISO. More noise is not necessarily bad, just keep in mind how high ISOs will affect your photo!
So what ISO should you use? It depends on where you are and what the subject of your image is! If you're in a bright area, a low ISO is probably fine. But if you're in a darker setting, and want to keep faster shutter speeds, then a high ISO might be the way to go!
APERTURE
Aperture is how wide the lens is opening during the shot. A wide aperture lets a lot of light in, while a smaller aperture lets less light in.
Aperture is measured by f-stops, which can get a little confusing because lower numbers (for example 1.4 or 1.8) means a larger aperture, and higher numbers like 22 mean a smaller aperture.
Here's an illustration of the difference between a larger and smaller aperture:

Aperture has a big effect on exposure! If your shutter speed and ISO stayed the same, a shot with a large aperture would be a lot more exposed (and brighter!) than a photo with a smaller aperture.
Aperture also changes the depth of field of the image. If you want a shallow depth of field with a blurred background, then you should use a larger aperture. If you want a deep depth of field with more in focus, you'll need a smaller aperture.

These three images are pretty similar, but you can see the difference that the aperture makes to the background. The photo on the left with the larger aperture (lower number) has a much shallower depth of field and the background is really blurred compared to the others!
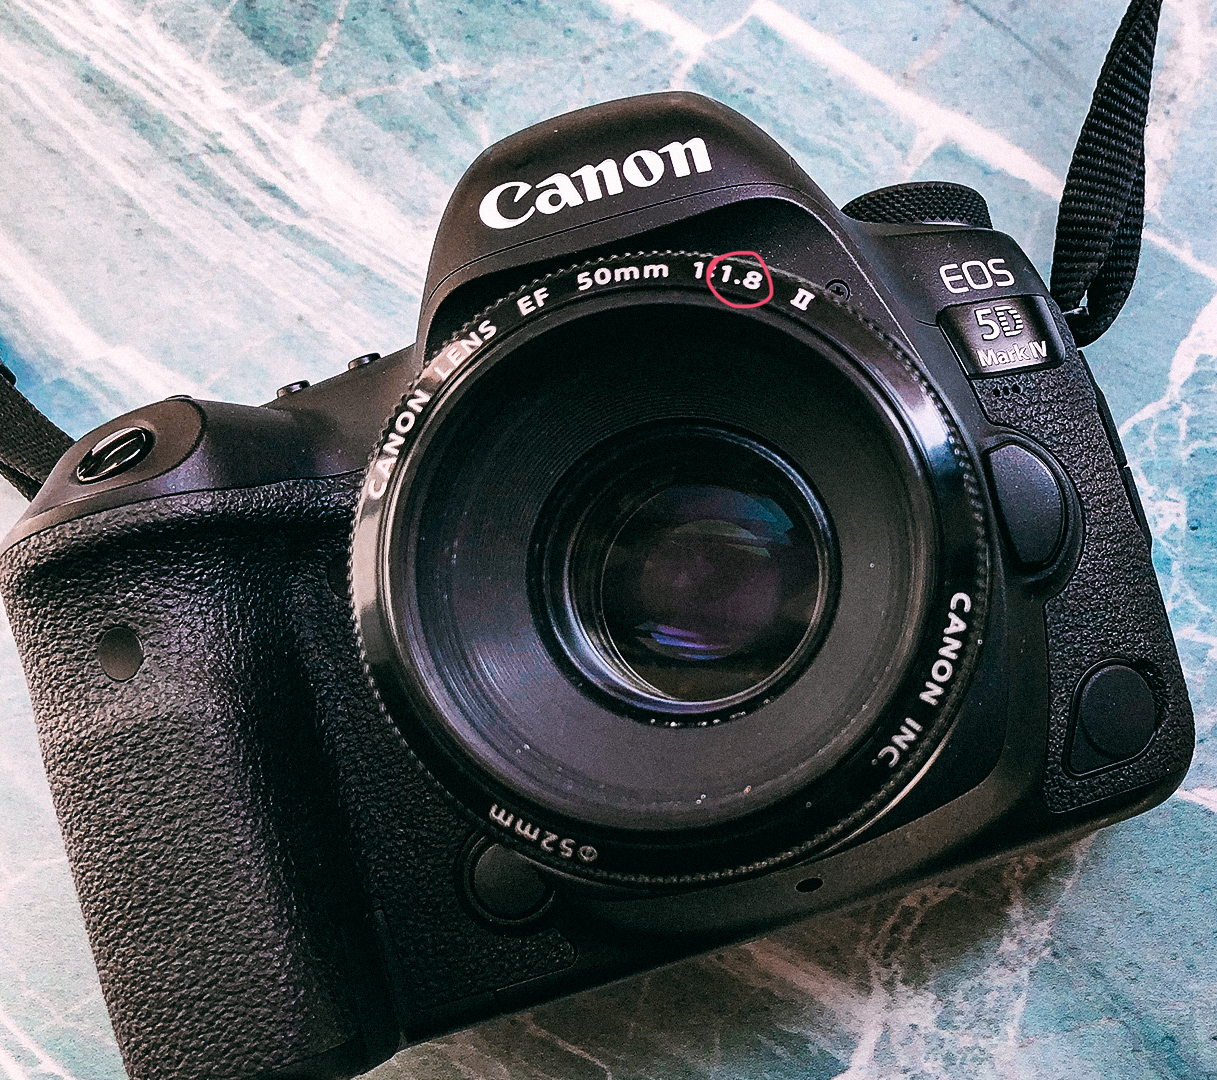
Keep in mind that your lens will determine the max aperture! When I was first starting out in photography, I didn't realize this and was so confused about why my camera wouldn't go lower than an f-stop of 4. haha
The camera below can go to f/1.8, a pretty wide aperture! Take a look at the front of your lens and it will have a number on there which is the max aperture. Usually lenses with larger apertures (lower numbers) are more expensive!
SHUTTER SPEED
Shutter speed is pretty much what it sounds like! How quickly the lens opens & shuts to let light in. Film and camera sensors are pretty sensitive so we're usually talkin' just fractions of a second!
If your subject is moving, slower shutter speeds will show the motion and often show up blurred. Fast shutter speeds capture everything so quickly that you can't see any movement or blur! Photographers tend to use fast shutter speeds when taking action shots.
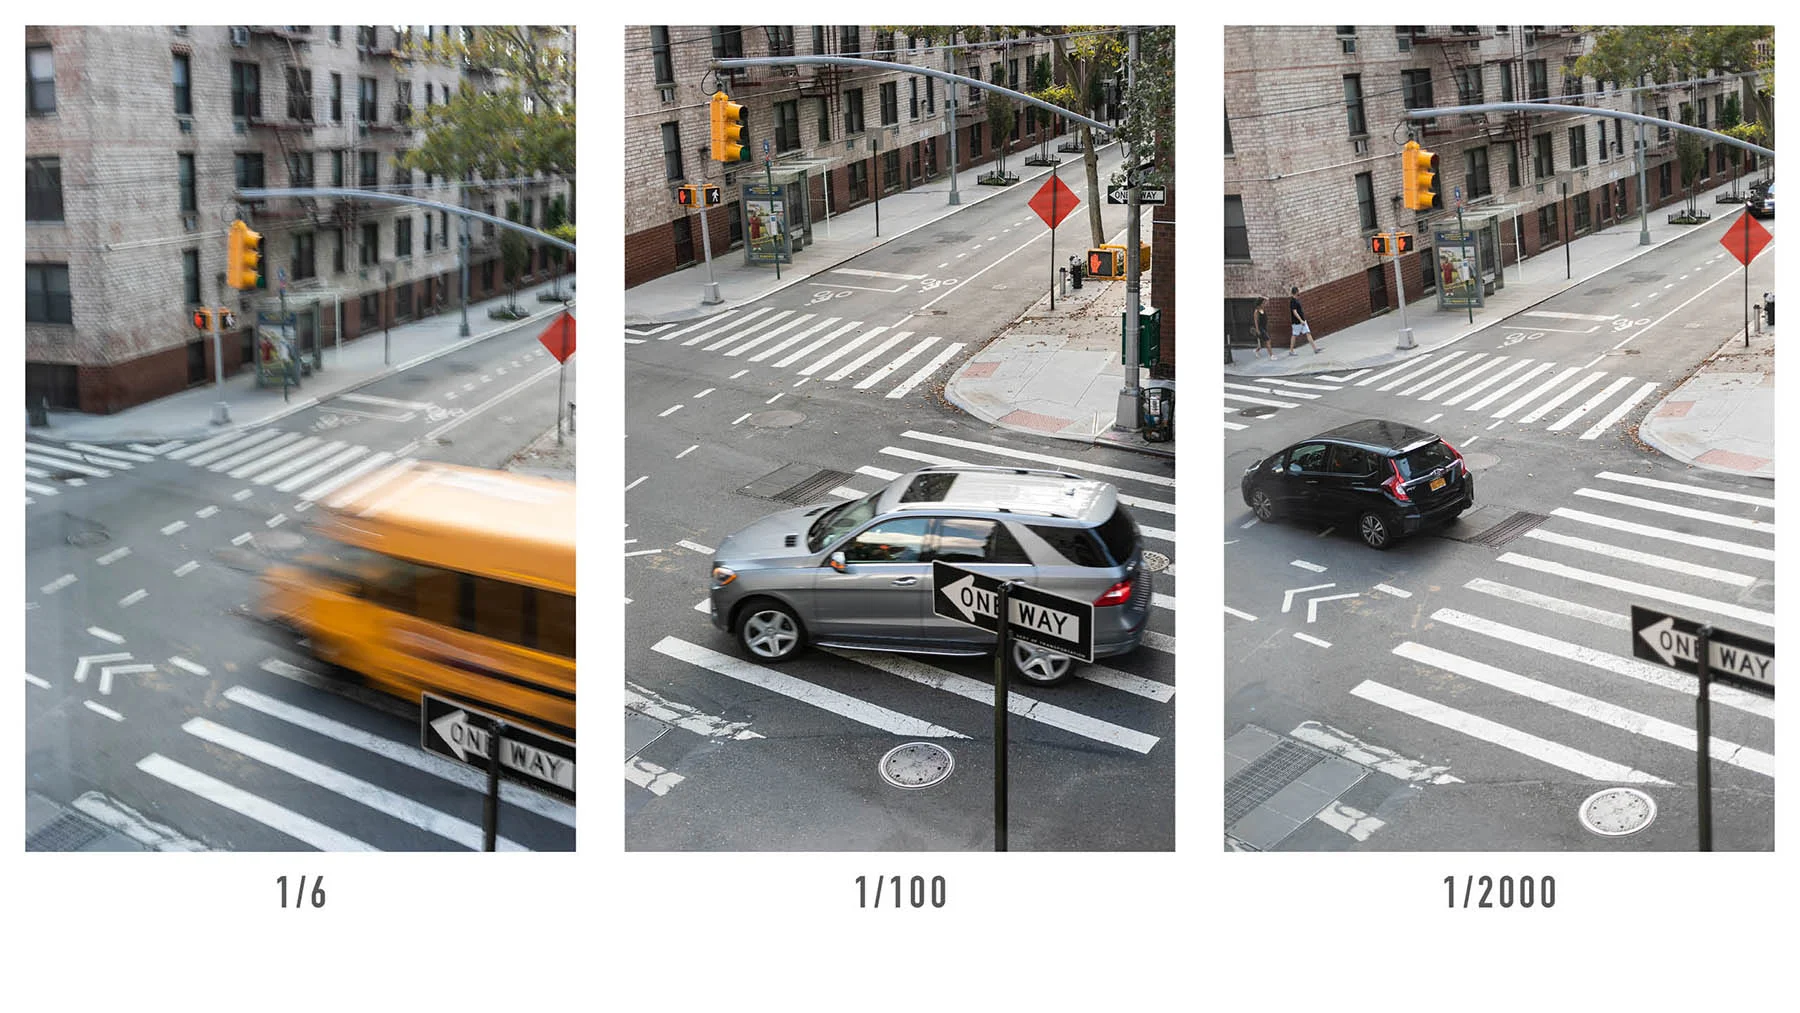
If your subject isn't moving, shutter speed is still very important! If your shutter speed is too slow, it will capture the slight movements of your hands and body, which can make your image look a little bit blurry or "out of focus". A good rule of thumb is to shoot at 1/125 or faster!
Take a look below, the images look very similar but on the 1/20 shutter speed you can definitely see some camera shake!

LIGHT METER
Okay so now we know all about ISO, Aperture, and Shutter speed. Now how do they all work together?
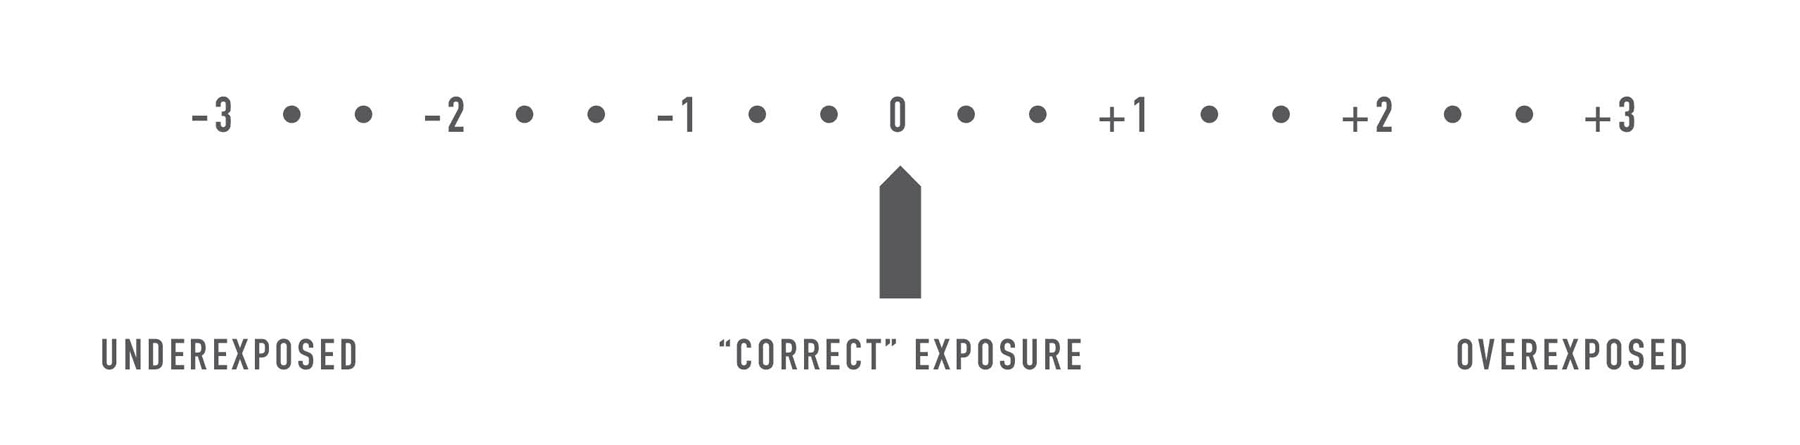
Almost every camera has a light meter that probably looks similar to this. When the meter is in the middle, that means you have the correct exposure. When it's to the left, in the negative numbers, your image will be underexposed (darker). When it's to the right, in the positive numbers, your image will be overexposed (brighter).
A few things to keep in mind...
YOUR LIGHT SITUATION
The light meter readjusts depending on what you're pointing your camera at and where you are. If you're aiming at something outside on a bright sunny day, you'll need less light to get the proper exposure. Let's say your light meter is balanced when your aperture is f/8 and shutter speed is 1/250.
If you keep those exact same camera settings, but move to a dark indoor room. The light meter will no longer be at the correct exposure, but it will be in the negative numbers, telling you that the image will be underexposed.
UNDEREXPOSED
If the light meter is pointing in the "underexposed" negative numbers, there's a couple things you can do to balance the exposure.
1. Make the shutter speed longer to let more light in.
2. Make the aperture larger (a lower number) to let more light in.
3. Make the ISO higher to make the sensor more sensitive to light (you would typically only do this if the aperture and shutter speed are already set to the widest/longest possible).
4. Add more light to the subject (not always possible) or move to a situation with brighter light.
OVEREXPOSED
If the light meter is in the "overexposed" area to the right, then you'll have to let less light in to balance the exposure.
1. Make the shutter speed shorter to let less light in.
2. Make the aperture smaller (a higher number) to let less light in.
3. Make the ISO lower to make the sensor less sensitive to light.
DIGITAL CAMERA MODES
There are a few different camera modes that you can shoot in, and each will let you get the proper exposure in different ways.
AUTOMATIC
The camera automatically chooses the Aperture, Shutter Speed, and ISO based on the situation. This is good for quick shots where you don't have time to adjust the settings, but not ideal to shoot with all the time because you have less control of the final outcome of the photo.
MANUAL
You get to set the Aperture, Shutter Speed, and ISO, and can choose the camera settings you want. This is great because you have more control over the camera and the final result. The downside is that sometimes it can take a little time to adjust settings and you could miss a shot.
APERTURE PRIORITY (AV)
This is my favorite mode to shoot in! You have control over the aperture and can set the f-stop that you want, while the camera automatically chooses the other settings to get the right exposure. If you want a large aperture like f/1.8 to get a shallow depth of field, the camera will pick a faster shutter speed than if you set a small aperture like f/16.
SHUTTER PRIORITY (TV)
Similar to aperture priority mode, but you can set the shutter speed! If you want a quick shutter speed like 1/500, the camera picks a larger aperture than if you want a slow shutter speed like 1/20 to capture blurred motion.
Whew!! I know that was a lot, but hopefully camera settings and exposure make a lot more sense now 🙃 If you have any other camera questions, feel free to send me an email (kelly@kellycreative.co) or comment below!
Here's a cheat sheet you can share on Pinterest!

Now that you know how to get a shot with great exposure, you might want to learn more about the principles of editing! I created a guide that has all my editing tips! I breakdown each tool and give examples so that you can work with your photos to get the look you want!
I've been working on this guide for the past 8 months so I'm so excited to finally share it with you!! It's so helpful for any beginning photographer that wants to learn on their phone :)