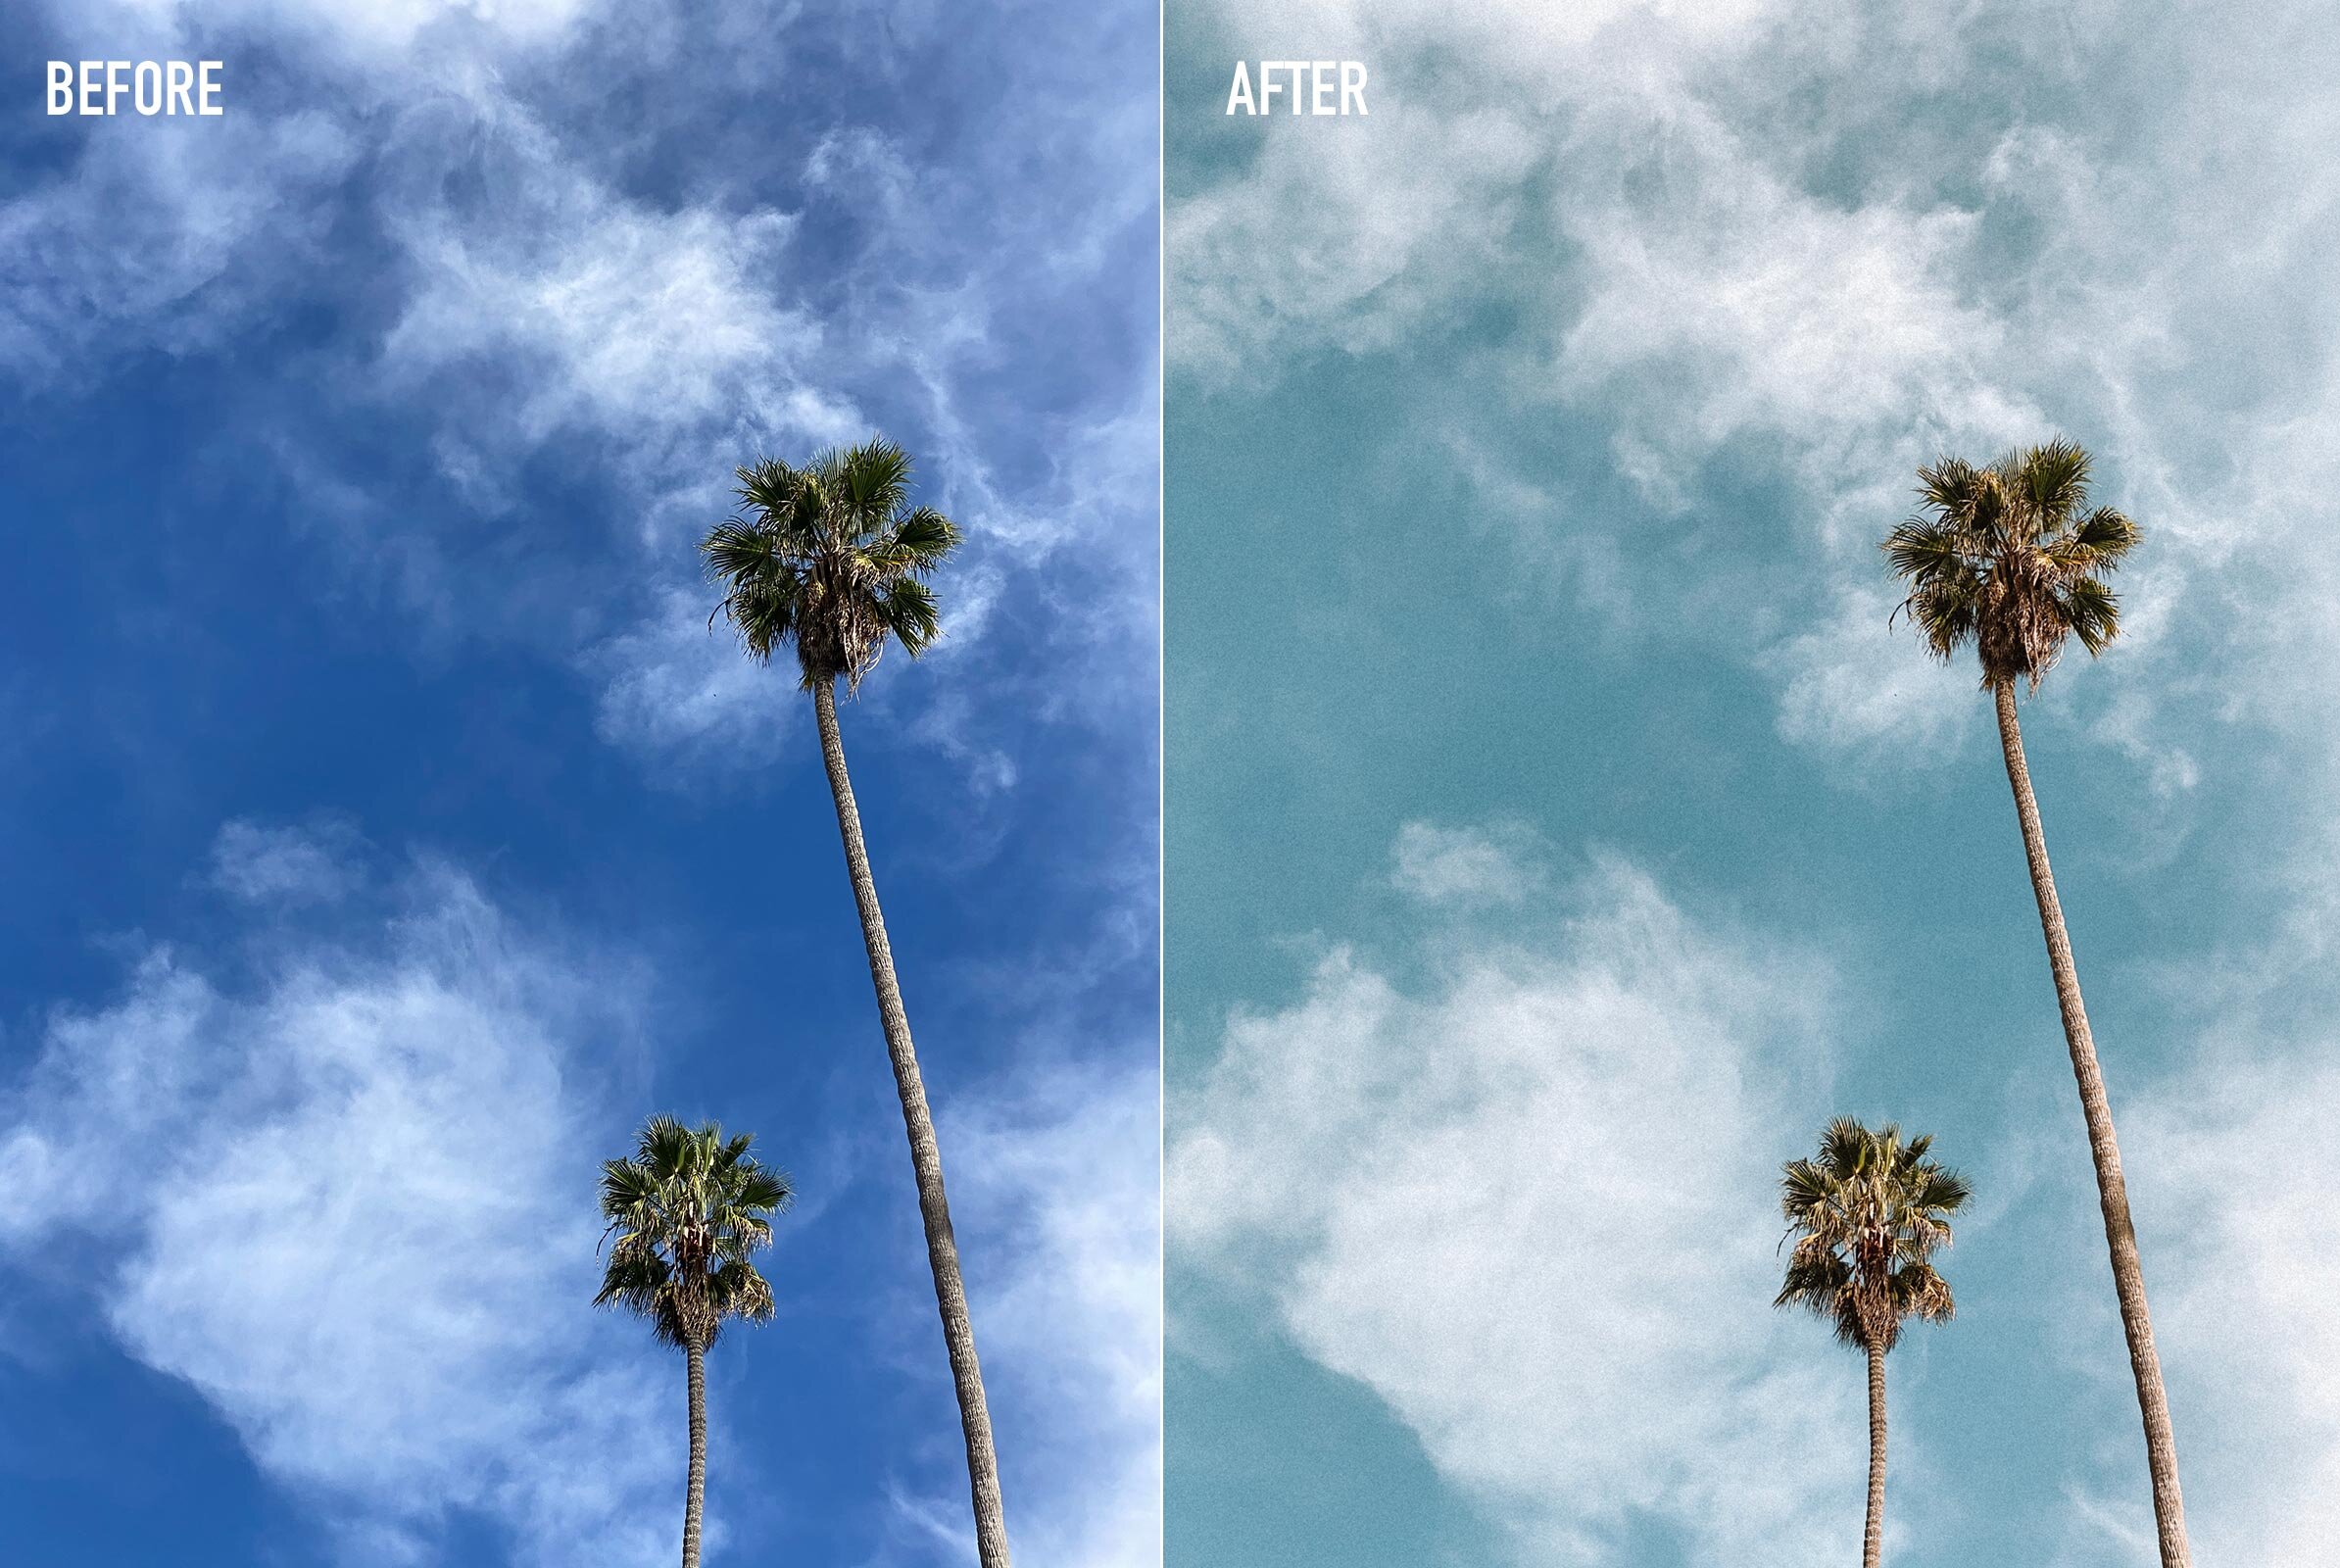
How to Edit the Sky Color in Lightroom
Hello beautiful friends! Kelly here, back with another mini photo tutorial! The other day, I took this beautiful picture of the palm trees in our neighborhood, against the sky, and I wanted to post it to my IG but the colors were just a little bit off to feel cohesive with my feed! I know that totally doesn’t matter to a lot of people and that is totally okay! Whatever your reasons for wanting to edit a sky?! I got you! For this photo, I used Lightroom Mobile to adjust the colors of the sky so that it would match my feed better. The color mix tool is amazing to adjust or tone down colors and keep your feed looking cohesive. Watch the Reels video or read below and I’ll show ya how to do it!
P.S. You can use the same steps to adjust any of the colors in the photo, not just the blues.
Ok I know Reels are a little fast, so here’s the instructions written out as well!
STEP ONE
Open the original photo in Lightroom Mobile.
STEP TWO
Click the ‘Color’ tool at the bottom. You may have to swipe the tools left or right if you don’t see it at first.
STEP THREE
Click the ‘Mix’ tool at the top right of the color panel.
STEP FOUR
Tap the blue dot to edit the blues in the sky. Each dot will edit the corresponding colors in the photo, so to edit the sky we want to edit the blues. Keep in mind if there are any other blue things in the photo like a blue shirt or blue umbrella, those colors will be tweaked as well.
STEP FIVE
Adjust the Hue. This makes the blues more green or more purple depending on which way you slide. I like to make the blues in the sky more teal so I slide a bit to the left.
STEP SIX
Adjust the Luminance. This will make the blues lighter or darker, I like to slide to the right to make the sky lighter and brighter.
STEP SEVEN
Adjust the Saturation. I like to slide this one to the left to make the blue less saturated and colorful. This gives it a more muted and ‘filmy’ look.
STEP EIGHT
You’re done! Click the ‘done’ button and you can hold your finger on the middle of the photo to toggle the original photo vs. the edit. I like to compare to make sure I like the edit :)
Got more photo questions? Ask me anything! Just DM me on Instagram and maybe I’ll make a tutorial video for you! Or you can always email me kelly@kellyfiance.com


